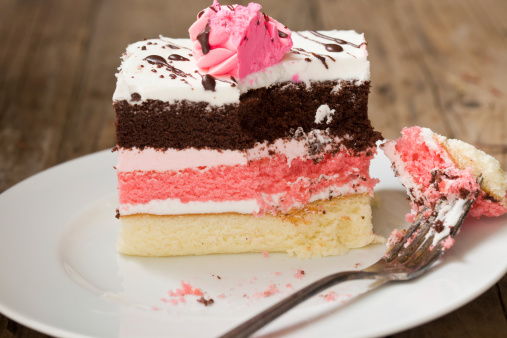
It is a very special recipe that I am presenting to you today, because it is a little cake well known to the public, which I have eaten since my childhood: the Neapolitan cake.
The first thing to know to make this cake is that it’s a recipe that requires a lot of patience and an entire afternoon to devote to it, because it’s not that complicated but the different steps necessary to preparation is quite tedious. But between us, the result is so good; it’s really worth taking your time!
INGREDIENTS

Utensils needed >
- A whisk.
- A spatula.
- A measuring cup.
- Two salad bowls.
- Two rectangular moulds.
- A bread knife preferably (for the final cut).
For the cake >
- 4 eggs.
- 95 g of sugar.
- 95 g brown sugar.
- 10 g of icing sugar.
- 200 g of flour.
- 20 g cornstarch.
- 100 g of melted butter.
- 1/2 teaspoon baking powder.
- 1/2 sachet of vanilla sugar.
- 1 C. unsweetened cocoa powder (Van Houten).
- 1 pinch of salt.
- 1 C. rum (optional).
For the ganache>
- 170 g of dark chocolate, preferably.
- 15 cl of liquid cream.
F the icing:
- 150 g of icing sugar.
- 2 to 3 tbsp. of milk.
- Chocolate vermicelli.
· RECIPE
- Step 1 > Preheat the oven to 180°.
- Step 2 > Mix sugar, brown sugar, icing sugar, salt and eggs.
- Step 3 > Add a little melted butter and a little sifted flour, mix, then alternate and repeat the operation until you have none left.
Add the cornstarch and the yeast, then mix again to obtain a homogeneous paste.
- Step 4 > Pour 1/3 of the batter into a new bowl and add the cocoa powder.
In the largest part (2/3), add the vanilla sugar as well as the spoon of rum if you wish, but the addition of alcohol is optional.
- Step 5 > Flour and butter your two rectangular molds: a very important step that I have the annoying habit of sometimes forgetting, and which is nevertheless essential for the design of a beautiful cake.

Pour the contents of the salad bowl containing 1/3 of the dough into one of the moulds, and 2/3 of the dough into the second mould, then bake for about 15 minutes. Watch carefully as the cake cooks quickly.
- Step 6 > carefully unmold the cakes and place them on a hard, flat surface.
For the rest of the preparation you will have to be very meticulous , a task that I left to my man who helped me that day, because he has great dexterity for this kind of operation which requires skill. haha.
You will therefore have to cut the rounded part of your cakes with a bread knife in order to obtain a flat surface that is easy to work with. If this step seems a little blurry to you, I invite you to look at the photos below.
- Step 7 > Cut the vanilla dough (2/3) in half lengthwise to form 2 rectangles of the same length, as in the photo below.
- Step 8 > To prepare the chocolate ganache , bring your liquid cream to the boil then pour it over the chocolate previously cut into pieces. Mix to obtain a smooth paste. Let cool to room temperature.
- Step 9 > after a few minutes of waiting, it’s time to assemble your cake. To do this, spread a thin layer of ganache over the entire first part of the vanilla batter, and then cover the ganache with the chocolate biscuit.
Spread another thin layer of chocolate ganache, but this time on the chocolate cake. Finally, cover everything with the last part of vanilla cake.
- Step 10 > Put the assembled cakes in the refrigerator for a good quarter of an hour.
Meanwhile, prepare the white icing, by mixing the icing sugar provided for this purpose, with the milk. Normally, three good spoonfuls of milk should be enough. However, you can add more to your liking, if the icing obtained does not suit you.
The important thing is that it is not too liquid or too thick in order to be able to spread it properly.
To finish, cover the top of the cake with the result of the frosting obtained and immediately sprinkle the white surface with chocolate sprinkles , so that they have time to integrate the frosting well.
Put a good hour in the refrigerator.

- Step 11 > take the cake out of the fridge, for the final cut: a fundamental step to have a PERFECT Neapolitan cake.
To do this, cut each side of the cake for a neat finish, remembering to clean your knife between each cut, to avoid traces of chocolate.
